How to build a react-native plugin in 2021
How to build a react-native plugin in 2021
A step-by-step guide to building TypeScript wrapping around native code written using Objective-C and Kotlin.

Motivation
By design, react-native has a javascript executed in a single thread. Moreover, the react-native ecosystem is quite different from the node.js, which means packages like crypto are not available by default.
The goal of this tutorial is two-fold:
- show how to generate crypto-safe random numbers in react-native;
- show how to build and publish react-native plugin for both iOS and Android.
Outline
- Existing tools to build react-native plugins in 2021
- Pre-requirements
- Creating a library
- Building a TypeScript plugin interface with basic test coverage
- Building an Objective-C part
- Building a Kotlin part
- Running an example application using a newly build plugin
- Finalizing your plugin
- Publishing your plugin to npm
Existing tools to build react-native plugins in 2021
Two years ago react-native team made a great decision to support CocoaPods by default starting with version 0.60. This move enabled a lot of developers to enjoy simplified maintenance of plugins and codebases that use such plugins.
This tutorial focuses specifically on using Objective-C for iOS and Kotlin for Android. While most of the steps in this tutorial can be easily done in Swift, the Objective-C version will make your life easier if you need to integrate older libraries written in C and C++.
Several tools will help you make your own custom plugin easier:
- create-react-native-module
- react-native-builder-bob
- create-react-native-library
- Cocoapod to create Pod (not just React Native)
In this article, I will show you how to use create-react-native-librarywhich has better community support, more templates out of the box with support for Swift, Objective C, Kotlin, Java, and TypeScript, and serves as a layer on top of react-native-builder-bob.
Pre-requirements
To build your library for iOS and ensure everything works correctly, you will need a Mac computer and Apple Developer account (a free personal one will work as well). Also, you will need:
- Xcode
- Android Studio
- Homebrew
- NPM —
brew install node - react-native —
npm i -g react-native - Cocoapods —
sudo gem install cocoapods
Creating a library
- Make sure you have the most recent NPM version installed.
- Use this command to initialize your new library:
npx create-react-native-library react-native-randomness
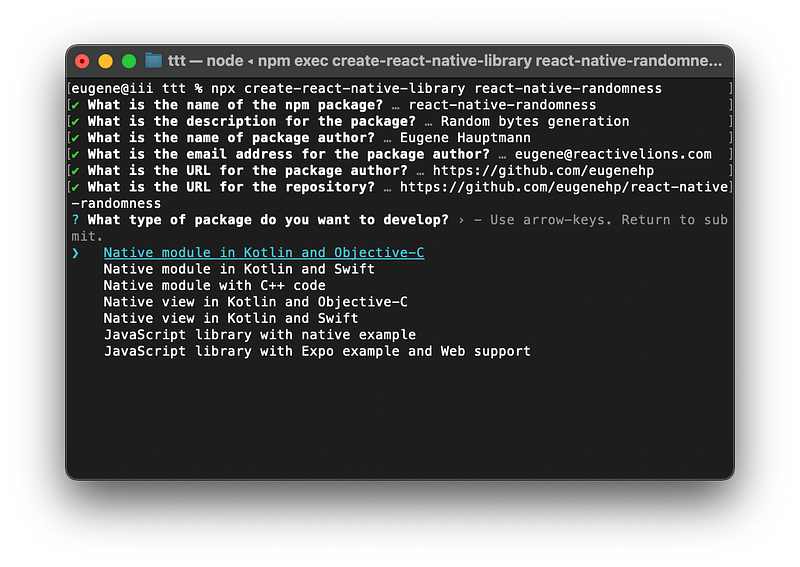
3. Pick Native moodule in Kotlin and Objective-C and click Enter.
Building TypeScript plugin interface with a basic test coverage
Random generation uses NSData on iOS and ByteArray on Android. Unfortunately, React Native communicates between JS thread and native code via the bridge, and it supports only JSON data.
For this reason, all data that is being generated by native code is being converted to Base64 format, delivered to JS thread via React Native Bridge, and converted back to UInt8Array to make it easier for the end-developer to work with the bytes directly.
However, this approach impacts the performance, as we always encode and then decode a byte array.
On the typescript level we use this code to do the decoding of Base64 code, here’s a source code.
The interface itself is much simpler:
And tests to cover the basic functionality:
You can find the above code on GitHub.
Building Objective-C part
Objective-C code of the library will be placed inside ios folder in the root of your library, and will have two pre-generated files.
Header file:
// Randomness.h
#import <React/RCTBridgeModule.h>
@interface Randomness : NSObject <RCTBridgeModule>
@end
And a method file:
This code uses a method called SecRandomCopyBytes to securely copy random bytes of the given length to the previously declared data variable.
If you want to learn more about random number generation, and how iOS executes it on the technical level, check their documentation here. Also, follow us to get notified about our next article that will address the security aspect of random number generation on mobile platforms.
Building Kotlin part
The template generated by create-react-native-library will have a slightly outdated Gradle version, so you would want to update it.
Gradle is a build automation tool for multi-language software development. It controls the development process in the tasks of compilation and packaging to testing, deployment, and publishing. — Wikipedia
Go to android/gradle/wrapper/gradle-wrapper.properties or check it on GitHub and update distributionUrl to version 6.3 :
distributionBase=GRADLE_USER_HOME
distributionPath=wrapper/dists
distributionUrl=https\://services.gradle.org/distributions/gradle-6.3-bin.zip
zipStoreBase=GRADLE_USER_HOME
zipStorePath=wrapper/dists
If you are new to Kotlin and coming from the Java world, I’d say that Kotlin to Java is what TypeScript to JavaScript. So you get better static typing, no “exceptions hell” and you can still use java packages you’re familiar with. Here’s an official comparison of Kotlin vs. Java on Kotlin’s website.
By the way, we’re hiring Kotlin developers, drop us a line if you’re interested.

So you’ll find two Kotlin files created by the generator.
The package description:
And the module itself:
On Android platforms, we use SecureRandom which was inherited from Java itself. While it is much better than JS Math.random() generation, it is not known to be cryptographically secure and has its own disadvantages.
Before we continue you need to know what is a cryptographically secure pseudorandom number generator (CSPRNG) first:
A cryptographically secure pseudorandom number generator (CSPRNG) or cryptographic pseudorandom number generator (CPRNG) is a pseudorandom number generator (PRNG) with properties that make it suitable for use in cryptography. It is also loosely known as a cryptographic random number generator (CRNG) (see Random number generation § “True” vs. pseudo-random numbers). — Wikipedia
We will address use cases of CSPRNG on iOS and Android in our new article, which will be released in one month. Follow us to get notified.
You can find all Android library-related code here.
Running an example application using a newly build plugin
The advantage of using a plugin generator is in the example application it creates for you automatically. Navigate to the example folder to see it for yourself. It is a classic react-native application that links your newly created library dependency to your parent folder.
Because the original template links to a slightly older version of react-native 0.63 you would want to upgrade yours to the most recent one, which is 0.64
And to make the example app work, you will need to update the Metro bundler and its configuration.
Metro is the JavaScript bundler for React Native. — Github
Now, let’s update the example app code to call our newly created plugin. Go to example/src/App.tsx and add the following:
Let’s try to run it:
cd example/ios
pod install
cd ../
react-native run-ios # to run on iOS
react-native run-android # to run on Android
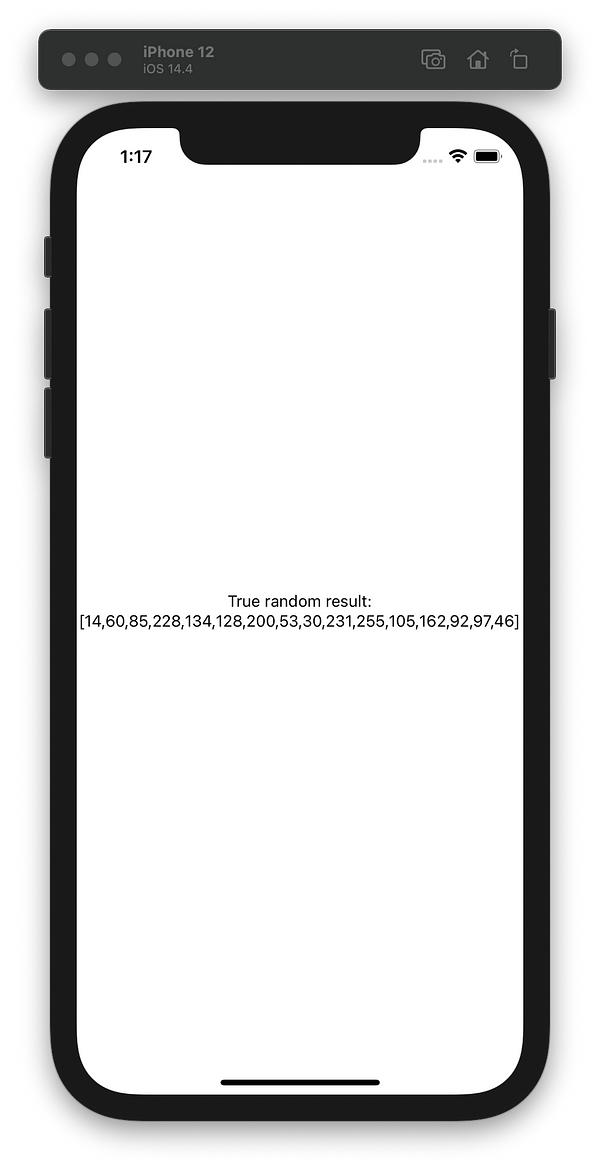
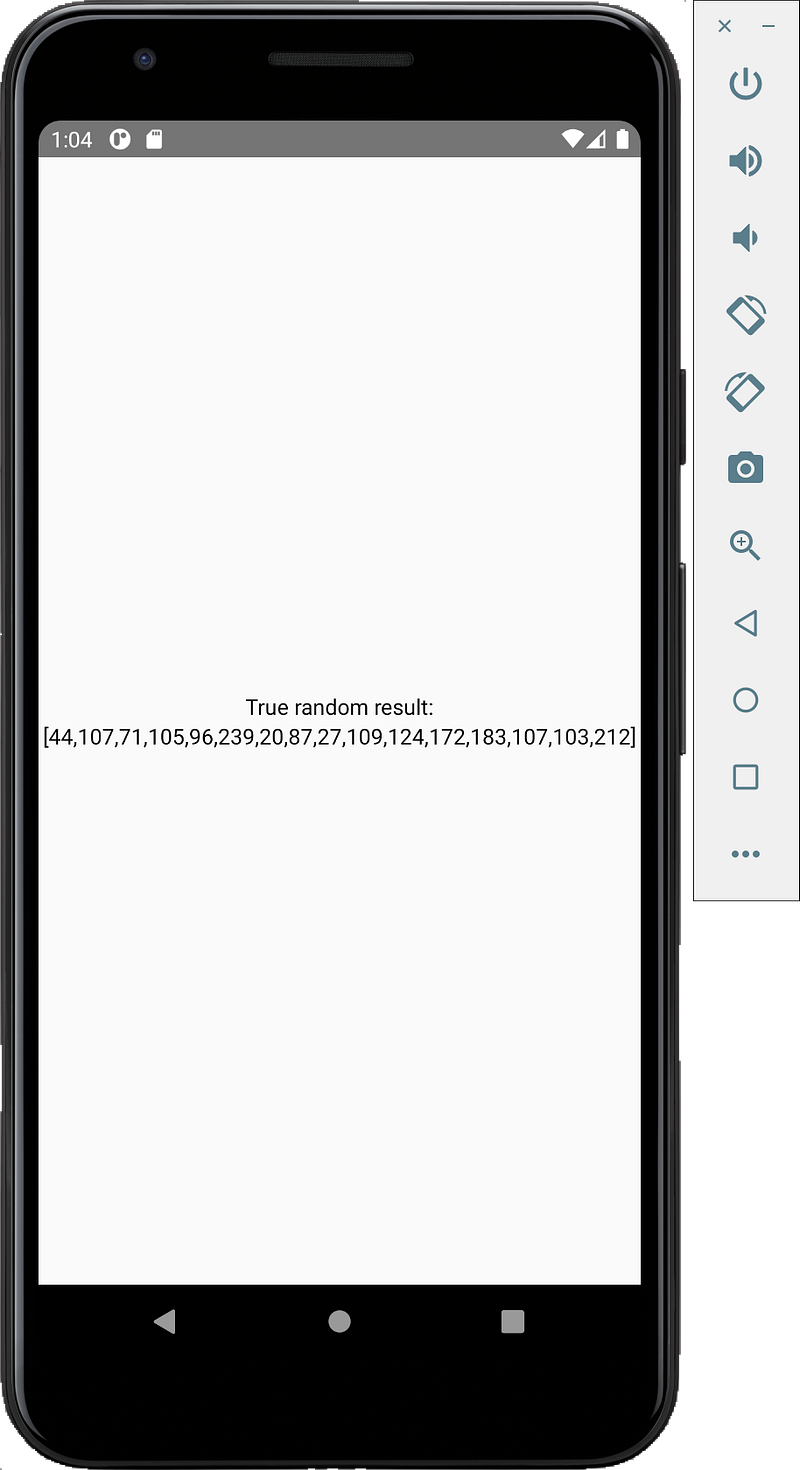
If you see the above screen in your simulator, congrats! It works! 🎉🥳👏
Great job!
Finalizing your plugin
Now we can use react-native-builder-bob to transpile the source code and generate a library for further distribution via NPM or GitHub Packages.
npm is a package manager for the JavaScript programming language. npm, Inc. is a subsidiary of GitHub, that provides hosting for software development and version control with the usage of Git. npm is the default package manager for the JavaScript runtime environment Node.js. — Wikipedia
bob build
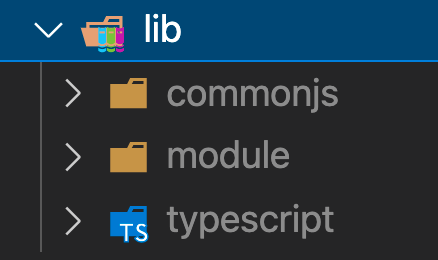
If everything went well, your code went through a linter, types were generated and code is stored in a newly created lib folder with all the parts.
Publishing your plugin to npm
Make sure that you’ve already signup with NPM and learned the basics of package publishing here. Also, check that you have the correct library name and version inside package.json , as it will be used to generate your NPM package page.
npm publish
This will get your package published on NPM’s Registry and it will be available for others to download and use.
react-native-randomness
_Secure generatation of random bytes using native functions in Kotlin and Objective-C. Example iOS application Example…_www.npmjs.com
Congratulations on publishing your first react-native plugin, and thanks for reading! Follow us to receive a notification when the next article is published.
About the author

Eugene Hauptmann, CEO of Reactive Lions™
Eugene is a faith-centric technologist, a serial entrepreneur, angel investor, advisor, and mentor.
He is the founder and CEO of REACTIVE LIONS INC. where he is implementing his vision of faith-driven entrepreneurship in the tech world. He is currently running a team of over 40 talented engineers across the US.
Eugene is the expert in building tech teams and he is a chief architect of scalable software products. His experience goes beyond B2B and B2C in multiple industries like Cyber Security, Deep Tech, FinTech, Media, AI, ML, Data platforms, Marketplaces, Wellness, Healthcare, Space, M&A, and more.
Contact us to learn how we can help your business build great tech.